05 Dec DIY Tutorial: Holiday Chalkboard Prints

I’m so sorry I haven’t posted this tutorial until now, we have been having some technical difficulties around here!
As I have stated before, I am not the most technologically advanced girl on the planet, though blogging has forced me to learn quite a bit in the past couple of years. Although I hope to get more of a grasp on Photoshop in the next year, these chalkboard prints were not done in any fancy program. They were created in Microsoft Word, imported to iPhoto, and printed at my local Walgreens. How’s that for simple?
I’m going to show you how I made the chalkboard prints so you can make your own design, but I also figured I would make the ready-made “All is Calm” and “All is Bright” prints downloadable for you. Therefore, you can print them off at your leisure and enjoy them in your own home.
Let’s begin the tutorial on how I made these pretties…
First, I downloaded the free chalkboard background from this site. This gal has a free green, blue, and gray (the one I used) background, and all you have to do is download them! Easy peasy.
Then in Microsoft Word, I opened a new document, and inserted the downloaded background as a photo.

For the fonts, I downloaded all three of them from Dafont.com. (which by the way, if you like lettering, and have a few hours to kill, browse around Dafont.com – it will suck you in!) If you don’t know how to download fonts, there are tons of how to videos and tutorials out there. I learned by watching a YouTube video. It is seriously simple, so don’t be afraid!
For the “All/Calm/Bright” words, I used the “Return to Sender” font. Found here.
For the word “is”, I used the “Respective” font. Found here.
For the flourishes and dot decor, I used the “Bergamot Ornaments” font. Found here. This font is actually really fun to play with, you can get all sorts of different designs by typing in letters and numbers.

To layer text on top of your chalkboard background, just insert a text box, place it where you would like, and then type your text in whatever font you like.

When you have your chalkboard print formatted and designed just how you want it, save it for safe keeping. Then you will need to save it again, but you will need to save it as a pdf. This is easy to do, though not intuitive since you will need to pretend for a sec that you are going to print your design. Simply go to File > Print > PDF > Save As PDF. (I saved mine to my Desktop.)

Once you have your PDF, open it, and go to File > Save As > Format > JPEG. Then save your print again. (I saved it to my Desktop.)

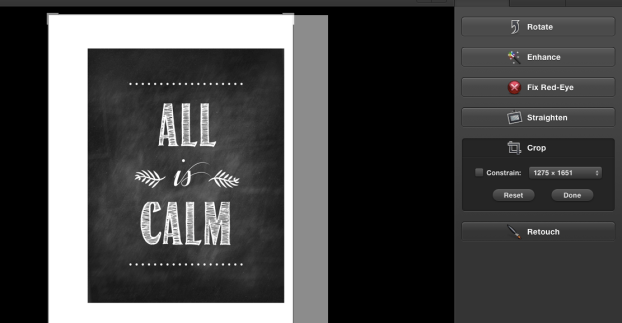
Drag your re-formatted chalkboard print into your iPhoto or whatever photo program you use so you can crop the white edges out.

From there, all you need to do is upload your photo to wherever you want to print it or print it at home! My photos are 11×14, and they turned out great!

However, as promised, here are the ready made “All is Calm”/”All is Bright” chalkboard prints for you to use. Print them any size, and enjoy them in your home!

May your hearts be calm and your spirits bright this Christmas season!
P.S. I hope this tutorial makes sense and seems as easy as it is! Please feel free to ask any questions!


Susan
Posted at 06:43h, 05 DecemberThanks for sharing this!
Grace
Posted at 12:13h, 19 DecemberSure thing, Susan!
emily
Posted at 07:04h, 05 Decemberwhere there’s a will there’s a way! amazing use of microsoft word! and thanks for sharing your hard work. really lovely.
Grace
Posted at 12:14h, 19 DecemberEmily, I know! Good ole Microsoft Word. Enjoy!
Melissa
Posted at 10:30h, 05 DecemberThank you!!! I really was clueless how to do this.
Grace
Posted at 12:14h, 19 DecemberMelissa, you are so welcome!
carina
Posted at 10:59h, 05 DecemberThank you!! I really love these prints. What an inexpensive way to add some beautiful Christmas art.
Grace
Posted at 12:15h, 19 DecemberCarina, exactly! They are really elegant looking, I think, and free.
Emily
Posted at 16:20h, 05 DecemberI can see these hanging in homes across America thanks to you! Thank you Grace. You are the best!
Grace
Posted at 12:15h, 19 DecemberEmily, ha! I hope so! I hope lots of people get to enjoy them year after year! xoxo
Kat
Posted at 13:05h, 09 DecemberOh, Grace. I’m so proud of you! Great, great, great job. Bergamot is one of my favorite fonts! It is designed by one of my favorite hand-lettered font designers, Emily Lime Designs.
Grace
Posted at 12:16h, 19 DecemberKat, I’m learning, right? I love that you already knew about the font and its background. of course!
  xoxo
xoxo
Lisa
Posted at 08:43h, 24 AugustThanks for sharing…making me crazy to pay $10 for someone to do this on etsy and it is so simple!!!