Hello hello!
I've taken a bit of a break this last month from blogging. Unplanned. Just with client work, and family, and flu season, and holidays, etc., the blog has gotten pushed to the side for a time. I do appreciate your emails and messages, and I do try to respond to all of them, though I am not quite caught up yet. So thanks for being here, I'm excited to show you what I have been working on.
I have written about my Guest Room/Office Makeover a couple of times -
the first post talked about how the color palette and trim was inspired, and
the second post was how the paint and trim came to be, quite a feat!
But my beautiful new space would not be what it is without my dear friend, Jen. You may know her from
her really great blog, IHeartOrganizing, or
her shop where she sells her practical and pretty products to help make your life more orderly.

We met at the BHG Stylemaker Event the year before last and hit it off. It was funny too because after reading her blog all of this time, I had thought before that "we could be friends". This past year at BHG Stylemakers, we were roommates and stayed a couple of days extra to pal around together. It was so fun and truly one of my most enjoyable trips to NYC ever.
I had told her before about this cough, rather hoarder looking "storage room" of mine (basically the "receiver" of projects around our house - i.e. "the bathroom is getting redone, so throw everything in here room"), and we both said, "wouldn't it be neat to collaborate?" It sounded awesome, but I was skeptical it could ever really happen. We live at basically opposite ends of the country and both have businesses to run and families to raise. But she hopped on a plane, and we did it together.
[caption id="attachment_9012" align="aligncenter" width="500"]

image via IHeartOrganizing[/caption]
The above photo is courtesy of Jen and showcases what we had to go through. This is the previous state of the closet. Yes, it had gotten so bad, I would literally throw things in here "that belonged" and shut the door, thinking I would get around to organizing it "later". Anyone else have any "later" spaces?
Much to my surprise, Jen did not run away screaming. She stayed with me for days, going through this mess, sorting it and putting it away, long into the night(s). This is true friendship. Love you, Jen.

Jen wrote about this makeover, especially focusing on the organizational aspects of it
here and
here. There are TONS of good, practical ideas here, so check it out.
Now onto the shelves...
I bought a pair of
these Stairway shelves from CB2 when they were having a major sale a couple of months ago.

I bought the gray instead of the white because at the time, they were cheaper and in stock! The white was backordered, although if I had gotten the white, I could have skipped the lacquering of the shelves since the shelves would have already been lacquered white.
I knew I wanted/needed two large shelving units on either side of my desk for storage and prettiness (and Edith Wharton's design philosophies -
see this inspiration post), but the room is not huge so I needed to be mindful of scale. We have nine foot ceilings in our home, so I knew it would be a good idea to take advantage of height. These CB2 shelves are eight feet tall, which is giant for this type of off-the-shelf piece, so it was a good choice.
The shelving supports were pretty non descript before. Gray. Metal.

I spray painted them gold before I gold leafed them just to ensure they would be gold even if I missed a tiny spot.

I could have stopped here, but I am so glad I didn't. The gold leaf gives so much dimension to these shelves.

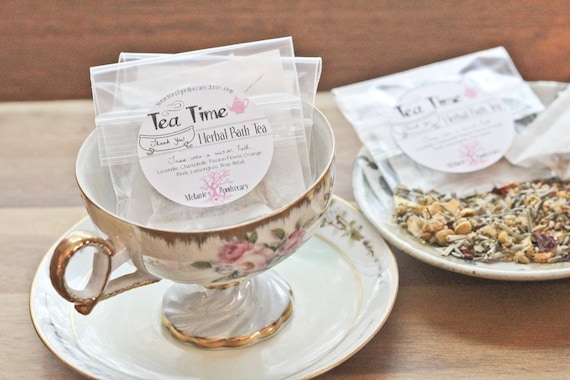
 Melanie's Apothecary Bath Tea[/caption]
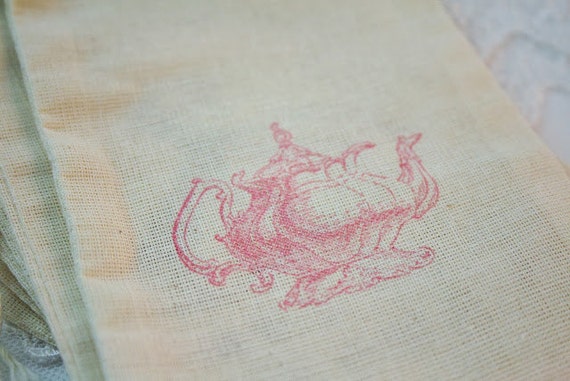
One packet of bath tea went into these pink teapot muslin bags along with some loose, fragrant lavender. (you can typically find this at health food stores and farmers markets)
[caption id="" align="aligncenter" width="570"]
 Pink Teapot Muslin Bags From OnTheWingsPaperie[/caption]
Since our Guest of Honor, Kelly Kay, is a creator of beautiful paper herself, I wanted to make something really special for her party favor tags.


 We met at the BHG Stylemaker Event the year before last and hit it off. It was funny too because after reading her blog all of this time, I had thought before that "we could be friends". This past year at BHG Stylemakers, we were roommates and stayed a couple of days extra to pal around together. It was so fun and truly one of my most enjoyable trips to NYC ever.
 image via IHeartOrganizing[/caption]
The above photo is courtesy of Jen and showcases what we had to go through. This is the previous state of the closet. Yes, it had gotten so bad, I would literally throw things in here "that belonged" and shut the door, thinking I would get around to organizing it "later". Anyone else have any "later" spaces?
Much to my surprise, Jen did not run away screaming. She stayed with me for days, going through this mess, sorting it and putting it away, long into the night(s). This is true friendship. Love you, Jen.
 Jen wrote about this makeover, especially focusing on the organizational aspects of it
  I bought the gray instead of the white because at the time, they were cheaper and in stock! The white was backordered, although if I had gotten the white, I could have skipped the lacquering of the shelves since the shelves would have already been lacquered white.
I knew I wanted/needed two large shelving units on either side of my desk for storage and prettiness (and Edith Wharton's design philosophies -


